Showing posts with label Cooking & Baking. Show all posts

Monday, September 19, 2016

Pantry in Action: Cider-Braised, Barbecued Pork Loin

The "Pantry in Action" series shows creative ways of using all the wonderful food we've preserved during the year. I will include recipes wherever appropriate with links back to the post(s) where a particular ingredient (or ingredients) was canned.

After a rainy, but productive Saturday, we were rewarded with a beautiful sunny Sunday. It started out cloudy and muggy but by noon the sun was out and it turned into a lovely afternoon. So, I decided to invite Colin over for a barbecue.

Earlier last week, I had found a nice little boneless pork loin roast that I had stashed away in my freezer so I decided to try a method I had used previously to great success on spare ribs that involves braising, applying a dry rub and then barbecuing low and slow, slathering with a tasty sauce. But, to gild the lily once more, I thought I would try adding hickory smoke to the mix.


So, to start, I gathered a few things together: my thawed pork loin roast, some aluminum foil, a small half-pint jar of my Cherry Barbecue Sauce, and a bag of hickory wood chips.


Put 3 cups of wood chips in a large bowl a cover with warm water. I placed a plate on top of the chips to keep them submerged. Allow the chips to soak for at least 20 minutes. I left mine for over an hour.


Take 2 similarly sized mini potatoes and cut them in half to use as stilts for the roast to sit on. Pour a can of apple cider into a dutch oven and arrange the four potato halves in the cider so they will support the roast. Lightly oil the roast, season with sea salt and freshly ground black pepper and place gently atop the potato halves so the roast sits above the cider.


Cover the dutch oven and place it in a 275F oven to braise for about 30 minutes to an hour, depending on the size of the roast.


Meanwhile, prepare the soaked wood chips by folding them into a foil packet leaving the ends slightly opened. Pierce with a fork  in several places on both sides. About 20 minutes before the roast is ready, remove the grill from a gas barbecue and place the packet of wood chips on one side of the heat shield. Replace the grill then light the entire barbecue, close the lid and leave on high heat for about 15 minutes or until there are generous tendrils of smoke issuing from the wood chip packet and you can readily smell the hickory.

For a charcoal barbecue, leave the grill off and light the coals right after you've put the roast in the oven. When the coals have a light coating of ash, spread them out and place the packet of wood chips directly on the coals to one side of the barbecue. Replace the grill and cover the barbecue. Leave it until there are generous tendrils of smoke issuing from the wood chip packet and you can readily smell the hickory.


Remove the roast from the dutch oven to a platter and rub with a dry rub. Turn all barbecue burners down to low and place the seasoned roast on the grill above the wood chips. Brush the top and sides of the roast with a nice barbecue sauce like this Sweet Cherry Barbeque Sauce. Close the barbecue and allow the roast to slowly cook in the smoke for about 30 minutes. Watch carefully. With a boneless roast it's easy to overcook it and end up with a dry chunk of meat. This method really does work best with bone-in cuts and is especially good with ribs.


While the roast is starting to grill, halve some more mini potatoes and place in a foil-lined barbecue basket with a bit of olive oil, tossing to coat. Turn cut side down so they crisp up. Add in the four half potatoes from the braise. Place the potatoes on the empty side of the grill and turn that burner up to high. Turn the roast over and brush with more barbecue sauce. Once the potatoes start sizzling, turn the heat down to medium-high and continue to cook. Every 10 minutes, turn the roast and brush with more sauce until a nice glaze develops.

When the roast appears done, remove from the grill and shut off that burner. Place on a cutting board, tent with foil and allow to rest for 10 minutes before slicing. When the potatoes are a nice golden colour, remove them from the grill and shut off the rest of the barbecue. 

Serve roast and potatoes with some steamed mixed vegetables.

Tuesday, August 2, 2016

Pantry in Action: Japanese-style Chicken Curry

The "Pantry in Action" series shows creative ways of using all the wonderful food we've preserved during the year. I will include recipes wherever appropriate with links back to the post(s) where a particular ingredient (or ingredients) was canned.


Okay, including this wonderful recipe in the Pantry in Action series is a real stretch since the only ingredient I have in my pantry right now is some tomato paste.  However, loving a good curry as I do, I couldn't not share this. The original recipe was published in the Toronto Star on July 16 and is actually called Chicken Katsu Curry from Scratch, but, as usual, I have tweaked it to make it freezer-friendly.

The chicken katsu is actually skinless, boneless chicken breasts, pounded thin, breaded with panko, fried until crispy then sliced into strips and served alongside the curry.  I figure the lovely crispness of the panko encrusted chicken would suffer by being frozen and thawed, so in order to make this dish more freezer-friendly (think re-stocking the freezer with ready-to-go meals), I decided to forgo the breading and frying and simply cube the chicken and include it in with the curry.


Thus, the four-part original recipe (which you can find here on the Toronto Star website) is reduced to three parts: the curry powder, the roux and the curry itself. 


The curry powder is lovely and reminds me very much of the Kowloon Curry powder I once had from Monsoon Coast, in a similar-but-different sort of way.


It couldn't be simpler:  place 1/4 cup ground turmeric, 2 tbsp ground coriander, 2 tbsp ground cumin and 2 tsp ground cardamom in a small jar or tightly lidded container.  Close the lid and shake until well blended.  It makes about a 1/2 cup which is more than plenty for this recipe and leaves you with enough to add to your spice cupboard ready for the next curry adventure!


For this recipe however, we'll be using 2 tbsp of the powder in the roux and another 1 tsp in the curry itself. I've always used coconut milk, yogourt or a combination of the two as the base for my curry sauces and for some reason it's never occurred to me to base one on a roux despite the fact that I've been making rouxs for years to thicken soups, sauces and gravies. Funny how your mind gets into ruts sometimes. So, using a roux to thicken a curry sauce shouldn't have been a big light-bulb-a-HA moment for me, but it was. I was intrigued and interested in seeing how such a curry would turn out.


So, to start, I gathered all the roux ingredients together: all purpose flour, my freshly made curry powder, some cayenne, tomato paste from my pantry, Worcestershire sauce and butter.


Start a basic roux by melting 3 tbsp butter (the recipe calls for unsalted, but all I had was regular, salted butter so that's what I used) then stirring in 1/4 cup flour, 2 tbsp curry powder, 1/2 tsp cayenne (this gives it the perfect level of heat in my opinion, sort of a mild-medium -- you might like it hotter, or not, so add cayenne at your discretion), and a few good grindings of black pepper.


Keep stirring until a cohesive paste is formed. Then add 1 tbsp tomato paste and 1 tbsp Worcestershire sauce and stir some more until the mixture becomes dry and crumbly. Remove from the heat and set aside.


Gather the curry ingredients together. As mentioned above, I am including the chicken naked in with the curry instead of breading and frying it and serving it alongside. In addition, we have 2 medium white onions finely chopped, 2 large carrots scrubbed and sliced, 2-3 medium potatoes (Yukon Golds would probably work very nicely, but all I had were Russets so that's what I used), a small apple, 2 tsp kosher or sea salt and 1 tsp of that wonderful curry powder.


I cubed the chicken breasts and sautéed them with the chopped onion in a little olive oil in a large pot until the chicken is no longer pink and the onions are starting to caramelize, about 30 minutes.


Add the carrots and 4 cups of water and bring to a boil. Meanwhile, peel, core and grate the apple. The recipe states that the apple is essential to provide the subtle fruity undertone that is characteristic of Japanese-style curries.


Once back to boiling, add the potatoes, grated apple, salt and the curry powder to the pot. Lower the heat to medium and simmer until the carrots and potatoes are tender, about 30 minutes.


Gently push a ladle straight down into the curry and carefully collect some of the sauce without any of the chicken or vegetables. Collect two cups of sauce.


Pour the collected sauce into the pan of roux and whisk until smooth then pour the roux back into the curry and stir well until smoothly combined.  Cook 1 1/2 cups of basmati rice in 3 cups of water or chicken stock and divide evenly among six 2-cup freezer containers. Divide the curry evenly among the freezer containers.  You will probably have enough curry left over for another meal. Lucky you, dig in! 


This curry is so good it may be difficult to do, but if you can forgo having some immediately, refrigerate it overnight and have it the next day. Like chili, it definitely improves with age and the consistency of the sauce is perfect -- it's exactly what I have been looking for.  So, this one's definitely a keeper and I will try making it again and follow the recipe exactly, making the breaded and fried chicken katsu to serve alongside the curry.

Saturday, July 30, 2016

Pantry in Action: Sweet Cherry Barbeque Pulled Chicken

The "Pantry in Action" series shows creative ways of using all the wonderful food we've preserved during the year. I will include recipes wherever appropriate with links back to the post(s) where a particular ingredient (or ingredients) was canned.

Having just discovered a bag of cooked chicken meat in my freezer left over from the last batch of chicken stock I made and with the wonderful Sweet Cherry Barbeque Sauce I made last week, this practically made itself!


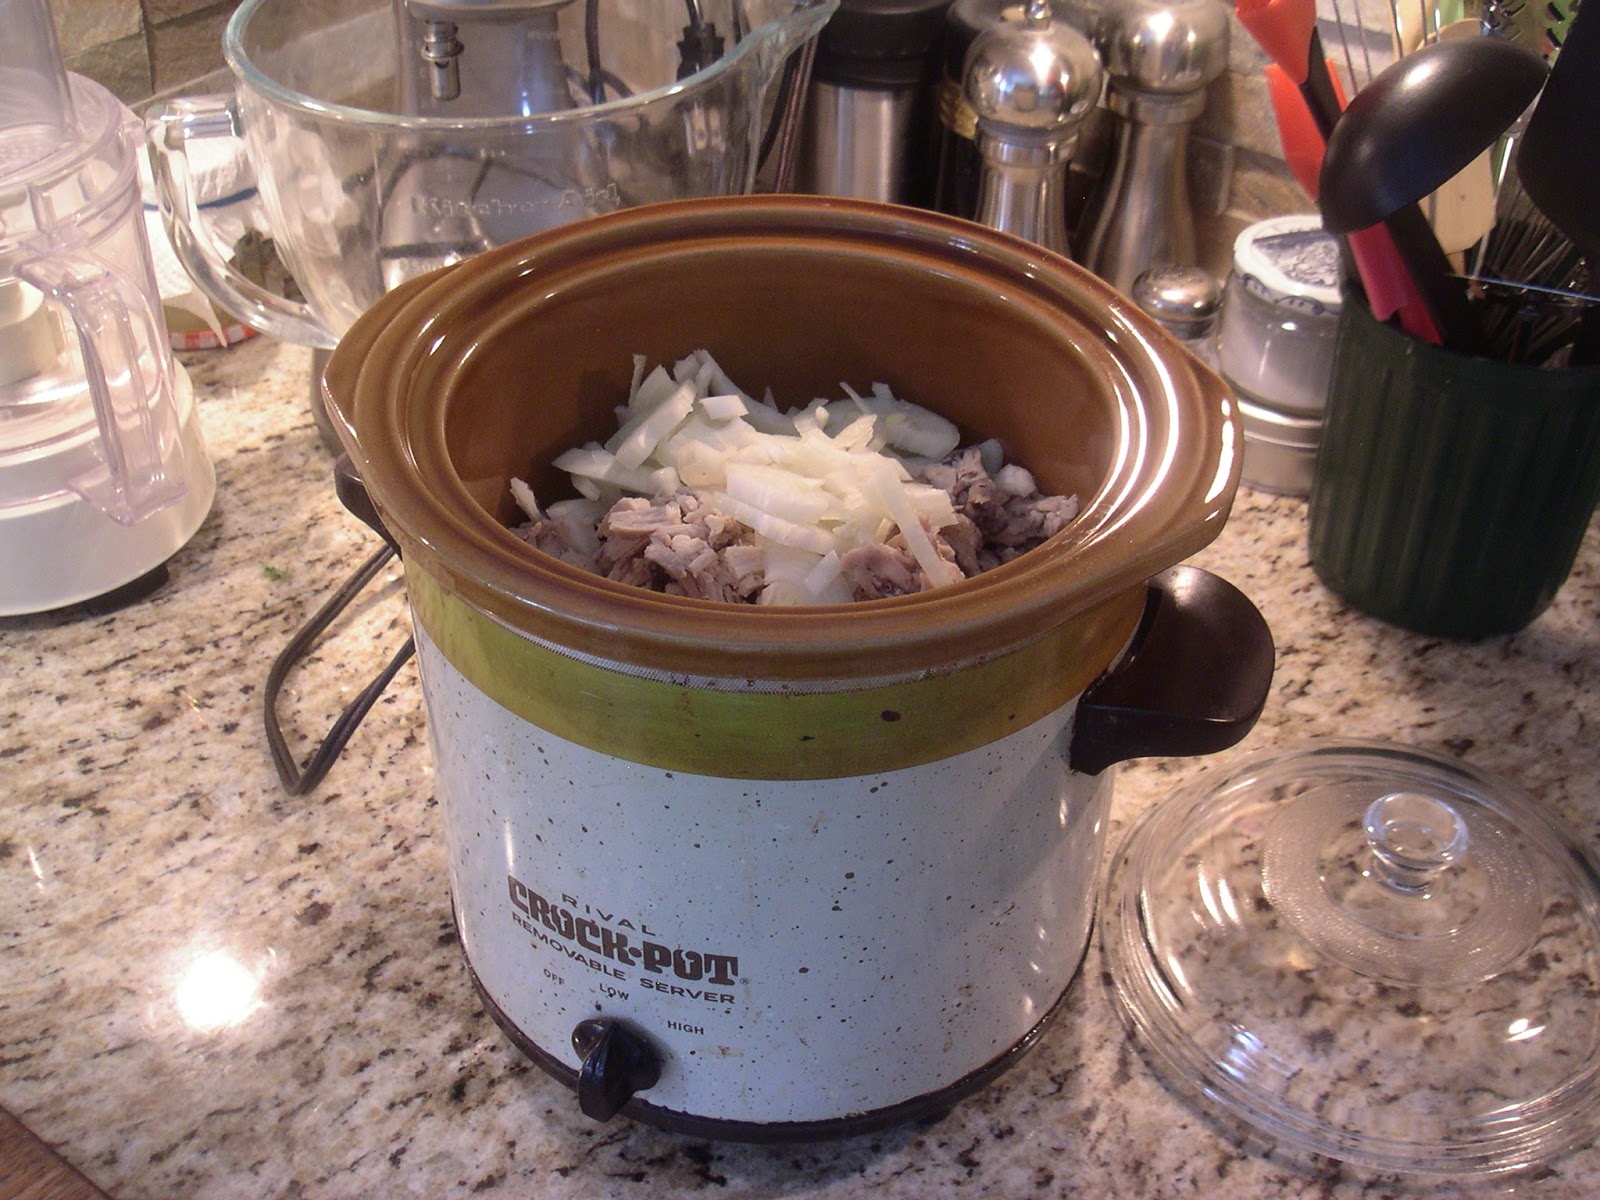
Pour a pint jar of Sweet Cherry Barbeque Sauce in the bottom of the slow cooker.  Add a medium-sized white onion, sliced thinly and the shredded, cooked meat of one whole poached chicken.  Cover and cook on low for 8 hours or so.  The end.


I split it between five 2-cup freezer containers paired with cooked brown rice and popped the containers into the freezer ready for a quick lunch or dinner. That barbeque sauce is amazing and packs a real punch!

Friday, May 13, 2016

Pantry in Action: Vegetable Barley Salad

The "Pantry in Action" series shows creative ways of using all the wonderful food we've preserved during the year. I will include recipes wherever appropriate with links back to the post(s) where a particular ingredient (or ingredients) was canned.

Always on the lookout for healthy eating choices, I was recently inspired by a co-worker's lunch of tabbouleh, the Mediterranean/Middle Eastern salad of tomatoes, parsley and bulgur.


Arriving home last night, I rifled through the vegetable crispers in the fridge and thought, "Why stop at tomatoes and parsley?". I discovered I had a red bell pepper, a yellow bell pepper, a couple of green zucchini, some celery, a bunch of asparagus and a red onion in addition to a large tomato and a bunch of fresh Italian parsley.

And not having any bulgur I spied some pot barley hiding at the back of the cupboard and thought "Why not?".


So, I began by cooking the barley the way I do rice -- a 2-to-1 ratio of cooking liquid to grain -- in this case using 2 cups of homemade chicken stock to 1 cup of barley, bringing it to a full boil and then covering and turning the heat down to low, leaving it to gently cook until tender, about 15 minutes. Pot barley, because it has most of its bran intact cooks up a little chewier than pearl barley or other processed grains, so don't think that it isn't cooked if it still feels a little firm.  Do a quick taste test -- it should be firm but tender with a nice chewy bite.


While the barley was cooking, I got busy and chopped all the vegetables into an even dice of about 1/2 an inch. The parsley was chopped finely. I heaped everything into a large mixing bowl and then went about concocting a dressing.


One the quickest and easiest salad dressings I've come across, and one that I make frequently just because it's so quick and easy and tastes so good is simply olive oil and red wine vinegar, emulsified with a little Dijon mustard.


For years I've had this little 4 ounce jar that originally held chopped garlic in oil. It's absolutely the perfect size for shaking together enough salad dressing to nicely dress a large bowl of salad for 4 people.

The basic ratio is one half jar of olive oil, one third of red wine vinegar and a large heaping tablespoon of Dijon mustard. Pop the lid on the jar, give it a good shake and voilà -- lovely salad dressing!


Pour about half the jar of dressing over the vegetables and toss to coat evenly. The bowl I'm using has a tight fitting lid that allows me to shake the whole thing together. Once the vegetables are nicely dressed, add the cooked barley and the rest of the dressing and mix everything together.

The greatest thing about this salad is it's complete flexibility. Like my Beans, Greens and Grains Bowl, you can just about throw together any combination of vegetables, greens and grains and call it good.

Same thing with the dressing. You can switch out the olive oil for canola, vegetable or a combination of oils, perhaps including a bit of toasted sesame oil for a little Asian flair. Try fresh lemon or orange juice in place of the vinegar.  Or, omit the mustard and just shake it together and pour. The possibilities are endless!

You can find the basic recipe here along with a few variations.