Showing posts with label Gardening. Show all posts

Friday, September 9, 2016

Isn't this where we came in?

Happy Anniversary to "A Locavore's Life"! It was exactly one year ago today that I posted my initial welcome to you, inviting you to share my journey. It's had its ups and downs, but overall I'd say I've enjoyed it.
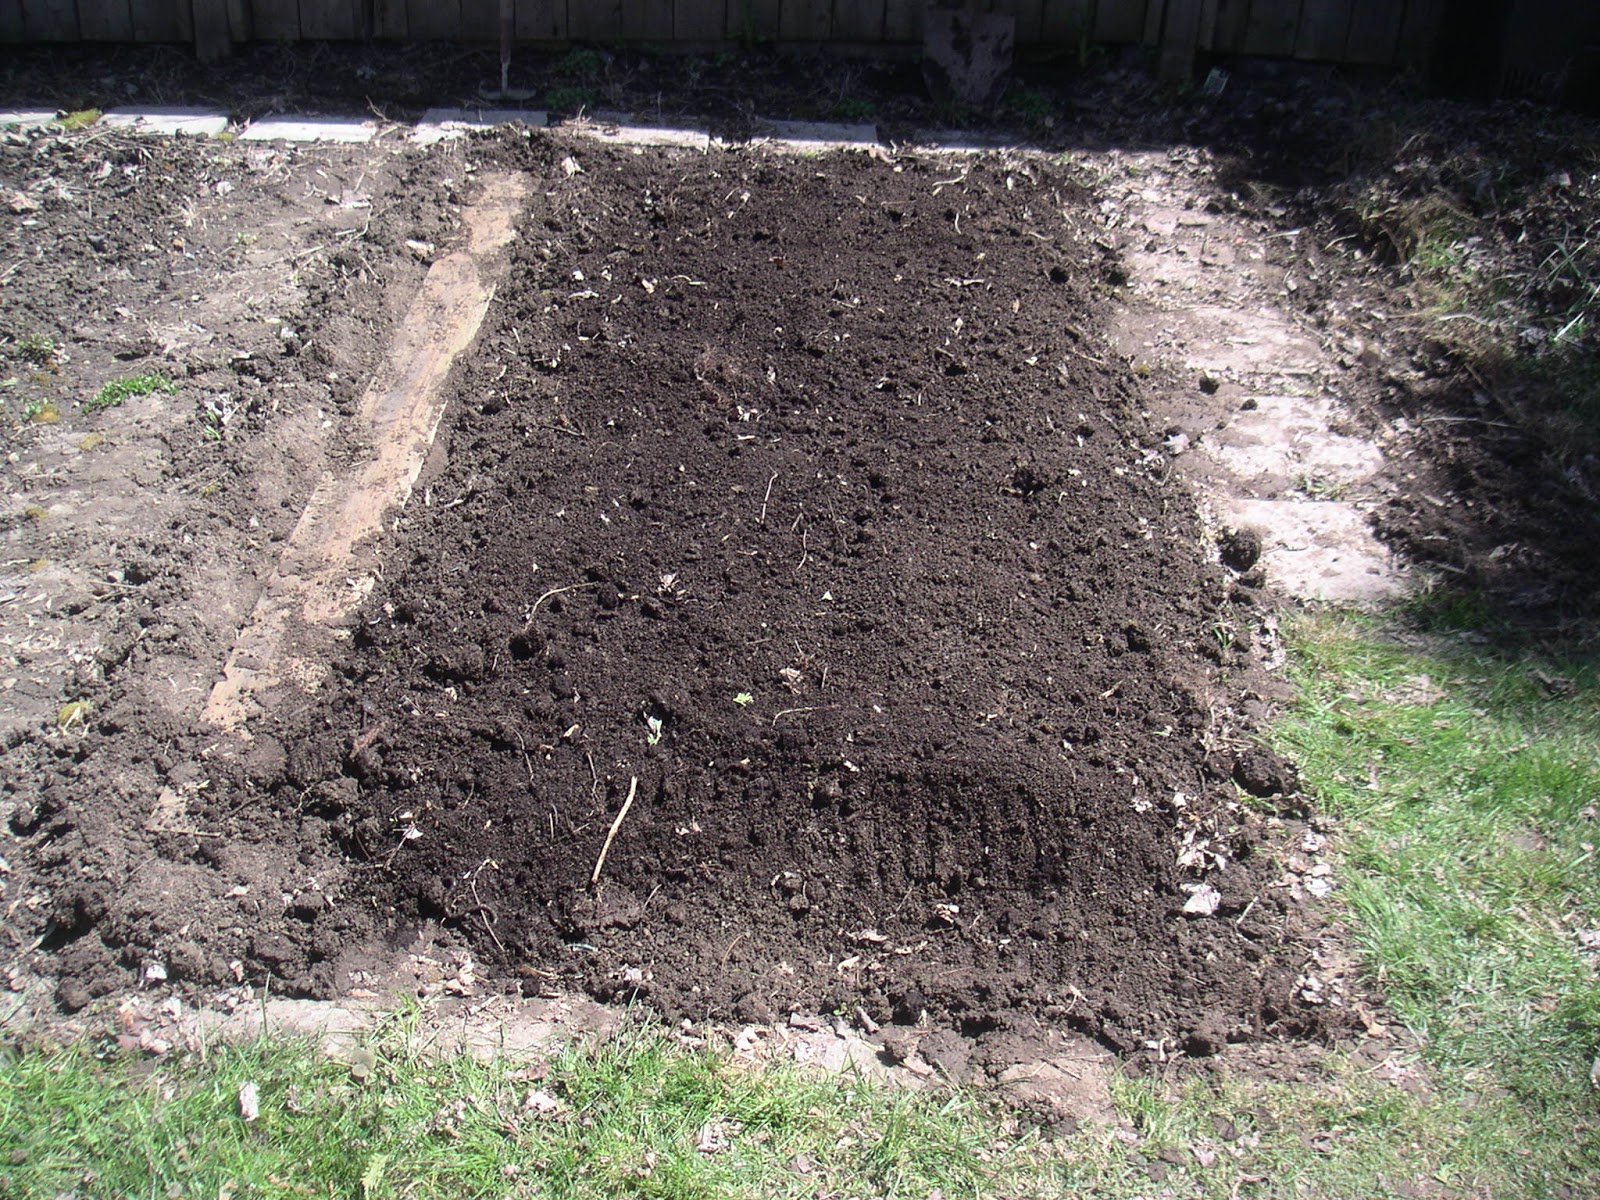
Faded glory, 2016
Just for fun I took the photo above yesterday evening to compare to this one,

Faded glory, 2015
 taken last year at this time. Not much difference, although this year's garden does look a little more "bedraggled" to me and I'm blaming the insane lack of rain over the summer combined with the sporadic torrential downpours we've had over the last 6 weeks or so.

It's made for a very unusual growing season and as my previous post indicated, I have been less than thrilled with the harvest this year. I still haven't put up any peaches yet, so I will hit the farmer's market again this weekend and see what I can find. Maybe some tomatoes too to put up as diced and perhaps some passata.

Truth be told, though, I've sort of run out of steam when it comes to the garden this year, so I've decided to more or less leave it to do its thing. Besides, in contrast to last year at this time when I was going through a slow period at work and had time to actually start this blog, this year I am insanely crazy busy, so I have very little real time or energy to devote to properly post. 

So, although I'm not actually saying I am taking a break from blogging, I'm expecting my posts to be much fewer and farther between than they have been. At least for the next little while. 

I do have some grand plans for later in the fall to build raised vegetable beds and a cold frame. I've been inspired by this great book: The Year-Round Vegetable Gardener: How to Grow Your Own Food 365 Days a Year, No Matter Where You Live by Niki Jabbour, figuring if she can grow lettuce in January in Nova Scotia, surely to goodness I can do the same here in Toronto!

However, it remains to be seen just how much time and energy (and money!) I will have. I may just be able to get the existing garden put to bed and ready for winter, never mind a major renovation! Then there's the fact that I have less than 10 months to go before I retire and then I will have all the time in the world to spend on such labours of love.

So, we will see. In the meantime, before I dove headfirst into the crazy circus that is my work at the moment, I was lucky enough to be able to spend 3 glorious days up at Sauble Beach at the cottage of my friend, Nancy.  

Despite the clouds, it turned into a glorious day!
Sauble Beach is about a 3 hour drive northwest of here on the eastern shore of the main body of Lake Huron renowned for its long stretches of sandy beaches and breathtaking sunsets. In fact it's been nicknamed "The Sunset Coast".


These shots were taken on an early morning walk and the sun hadn't fully risen yet. It turned into a beautiful clear, sunny day and later on this stretch of beach was packed with vacationers. I love the solitude and tranquility of early morning.

I cherished my time up there, but now it's back to work and full steam ahead!

Until next time...


Saturday, August 27, 2016

The Dog Days of Summer

Although we are a couple of weeks past the official "dog days", the hot humid weather continues here in Southern Ontario keeping us all in that slow, lazy, languorous state associated with late summer.


It's been a rather weird growing season as well.  After a cool and rather wet spring and early summer, for most of July we were in a severe drought with very little rain at all. Then August brought us a few decent rainfalls while still keeping the temperature hot.


What resulted is a garden that sprang to life, tomatoes and cucumbers full of blossoms and fruit which then seemed to come to a screeching halt through most of July.  I had lots of hard little green tomatoes which just refused to develop no matter how diligent I was about watering.  It was very strange -- everything was healthy and green, not shrivelling up and dying, but nothing was growing.

The cucumbers have been coming in very slowly -- one or two every week or so, so I've only managed to put up a couple of small batches thus far.  My beloved Black Brandywine Cherry tomatoes along with a new member of my garden this year, Sweet Gold Cherry have been acting similarly, coming in a handful at a time.  The full-size Black Brandywines have been very sluggish and I've only picked three ripe ones so far with only another 4 or 5 green ones left on the vines.

As for the plum tomatoes, I nearly lost all of them to blossom end rot, but fortunately I sprinkled some bone meal around all the plants quickly enough to stop it from developing further.


Blossom end rot is caused by a lack of calcium, which is provided by a liberal application of bone meal. Ideally some bone meal should be sprinkled in the hole before planting with a light top-up later in the season.  Blossom end rot is characterized by circular dark brown lesions on the blossom end of the fruit as in the picture above. It's not contagious and all you need to do is remove the afflicted fruit and throw it out.

I'm still coming across a few diseased tomatoes, but they're few and far between now. And now with a number of good rain showers plus the continued heat, the tomatoes are finally starting to ripen.


It's nowhere near what last year's harvest was, so there is a lot less canning from the garden happening this year. 

Today's harvest

Instead, I am supplementing with produce from the farmer's market. This morning I went back out to the Port Credit Farmer's Market and picked up 2 liters of Ontario strawberries (the everbearing ones are still around although starting to dwindle), a 3 liter basket of freestone Ontario peaches and a 3 liter basket of Ontario plums.

The peaches and plums are destined to be canned in a very light syrup to be spooned over yogourt for breakfast on the coming dark mornings of winter. I will stew the strawberries together with some late-season rhubarb that my friend Fred gifted me.

First off, though, I wanted to add the few cucumbers I picked this morning to the ones in the refrigerator crisper and put up another couple of pints of pickles.


Same with the tomatoes. I figure I have enough now for a couple of jars of diced and a couple of the ones in the crisper are starting to go soft, so I will definitely get to that tomorrow.

While I was looking up the instructions for canning plums in very light syrup, on a whim I flipped through my jam recipes to see if there was anything plummy that might strike my fancy. And indeed there was! This one for Plum Jam with Star Anise sounded so simple and good I just had to try it. It calls for a pound of plums and the 3 liter basket I bought gave about 2 1/2 pounds so I thought I would try a batch of jam and put up the remaining 1 1/2 pounds in very light syrup.


So, tomatoes forgotten for the moment, I set about prepping the plums. I weighed out a pound of plums for the jam, then cut them in half, dug out the pit and chopped the fruit into small pieces.


Three quarters of a cup of granulated sugar and 3 star anise are added to the chopped plums then mixed well and set aside to macerate for an hour or so to let the star anise infuse the mixture.

I then pitted the remaining plums and cut them into quarters.


One pound of pitted and chopped plums macerating in 3/4 cup white sugar and 3 star anise on the right ready for jamming and 1 1/2 pounds of pitted and quartered plums on the left ready to be canned in very light syrup. After an hour of macerating, the star anise has infused the chopped plums and sugar with an exquisite warmth. It's truly a combination worth trying!


The quartered plums are now simmering in a very light syrup which is 1/2 cup white sugar dissolved in 5 cups of water and brought to a boil. I used half of the syrup here for the plums and I allowed the remaining syrup to cool to room temperature before putting it in the fridge in a quart mason jar.


I will use this tomorrow when I do the peaches.


The jam is made in a non-stick frying pan instead of a saucepan so that the wider surface area allows the jam to cook up and set quicker.


I had originally thought I would use 2 jam jars for the jam and 2 pint jars for the plums in syrup. It turned out that I only needed 1 jam jar (on the right in the picture above) for the jam and I had enough plums in syrup left over to fill the other jam jar as well as the 2 pint jars. 

The jam only needed 10 minutes processing whereas the plums in syrup needed 20 minutes, so I put them all into the canner together and then pulled the jam out after 10 minutes and let the rest of the jars boil for an additional 10 minutes.

Tomorrow I will tackle the tomatoes, the peaches and the strawberries and rhubarb.

Saturday, July 30, 2016

Port Credit Farmer's Market, Strawberry Preserves, and my own Black Brandywine Cherry Tomatoes!!

Even though it was overcast and cool with the occasional sprinkle of rain, I ventured out to the picturesque village of Port Credit, about a 20 minute drive from here and a part of the larger City of Mississauga for many years.

I was after strawberries to both jam and put up in syrup and I had been told a couple of weeks ago that although the early strawberries were pretty much finished, the everbearing strawberries would be at their peak about now, so I thought I would check it out.


There were some strawberries, but not a many as I though there would be.  Perhaps they peaked last week. Anyway, there were enough to choose from, the going rate between $5 and $5.50 a quart or 2 quarts for $10.  I managed to find a flat of 6 quarts for $28.


My apologies for the blurry photo -- all this fresh produce left me quivering with excitement!  This group had the biggest, best looking berries and it was from them that I bought my flat.


Home again and time to start in on the preserving.  Not being a big eater of jam, although I do love it, I decided to set aside 1 quart of the strawberries and make a small batch of jam and I will preserve the rest in a very light syrup. I have done this a couple of years in a row now and although canned strawberries tend to get flabby, mushy and "blown-out", I still enjoy them over ice-cream or over yogourt for breakfast.  Nothing lifts my spirits on a cold, dark winter's morning than the fresh summery taste of my own canned fruit and strawberries, despite their texture, are no exception!

Part of my inspiration for making jam (apart from the joy of having some in my pantry) is the jars I will be using. I inherited 4 little round jam jars a few years ago from my cousin, Lynn and I instantly fell in love with them.  I had never seen them before and apparently they were available years ago, but Bernardin stopped making them.

Back in March of this year, Marisa posted on her blog about Ball (the American equivalent of Bernardin -- both are owned by Jardin) bringing back these jars. I was thrilled and thought it was only a matter of time before Bernardin followed suit and brought them back to Canada. Sure enough, about a month ago, they showed up on Bernardin's website with the note that they were available at major retailers.


So, I first checked Canadian Tire, my usual canning goods supplier, but to no avail.  Same with Home Depot, Lowes, Rona and even Home Hardware.  Lots of the usual canning jars, but no little round jam jars.

Finally, I did what I should have done in the first place and asked Mr. Google. And, much to my supreme chagrin, there they were waiting for me at that death-star of the evil empire: Wal-Mart!! I make a habit of avoiding Wal-Mart like the plague, so it was with firmly gritted teeth that I swallowed my pride and with eyes burning from my hypocrisy, bought two sets of 4 jars. Sigh! My hatred of Wal-Mart is the stuff of legend and may be worth a ranting post of its own some day.  Not today, though, and not here.


So, to prepare the strawberries, I first set aside one quart basket of berries from the flat, give them a good wash and proceed to trim and hull them, chopping the smaller ones into quarters and the larger ones into eighths.


Once all berries from that one quart basket have been trimmed, hulled and chopped, I mix in one cup of granulated sugar.


Covering the bowl, I popped it into the fridge to allow the fruit to macerate overnight to extract as much juice as possible.

I repeated the washing, trimming and hulling with the remaining 5 quarts of berries, but I leave the smaller ones cut in half and the larger ones in quarters for preserving in very light syrup.

And, to end off, I'm am so excited to announce that my beloved Black Brandywine Cherry Tomatoes are now starting to ripen. All that babying and coddling have paid off!


Same amazing taste as their big brothers. I'm thrilled to have them now in my collection!  Tomorrow, I will tackle the macerated strawberries, make a small batch of strawberry jam and put the rest up in very light syrup.  Stay tuned!

Sunday, June 5, 2016

Pantry Inventory 2016

With the canning season approaching once again, it's the perfect time to take stock of what was consumed from the pantry over the last year and what remains. This gives insight into what things you actually eat more of and what you don't and from that you can determine what you should be growing and canning.


Last year, I pretty much dedicated my entire vegetable garden to tomatoes, knowing I use a lot of them in my cooking. I wanted to create enough of an inventory of tomato products to carry me through the year. What has surprised me is number of jars of pasta sauce that remain while my jars of diced tomatoes are all gone. I thought I would use both sauce and diced tomatoes in equal measure, judging by my cooking habits over the previous year.  It appears I use more diced tomatoes than sauce, so this year I will adjust my canning accordingly and when the time comes, I will put up the majority of my tomatoes as diced.


Meanwhile, though, the rhubarb is bursting forth in all its glory, so I have been busy pulling it to try and keep it thinned out and hopefully allow more stalks room to thicken up. I realize that the crowns I moved earlier this spring really should be split apart but I had neither the time nor the space to do so this year and consequently the crowns are putting out many skinny stalks as opposed to fewer thicker ones, hence the frequent thinning.


I must admit, though, they do appear to be liking their new, sunnier location and I suspect the addition of compost and manure to their bed didn't hurt either.  I stewed my first batch of rhubarb last weekend and had it over yogourt for breakfast. Heavenly! For now, though, I am freezing my trimmed and chopped rhubarb, collecting and saving it for the next few weeks until the Ontario strawberries are available and I'll be able to make Strawberry-Rhubarb stew and perhaps some Strawberry-Rhubarb jam (same basic recipe -- just more sugar in the jam than in the stew).  Watch for an upcoming post and recipe!

Tuesday, May 24, 2016

Garden chores: Planting!!

Finally, finally!! The Victoria Day long weekend arrived and it was spectacular. Mother Nature, all is forgiven! It was the perfect weekend for doing what we in Southern Ontario traditionally do -- plant our gardens.

This weekend is one of the busiest for garden centres in the region, so crowd-adverse as I am, I bought everything I needed ahead of time and stayed put in the peace and quiet of my own back yard.


In a previous post, I mentioned the concept of "square foot gardening" as described by Canadian gardening guru, Mark Cullen, in his excellent book "The New Canadian Garden". As its name states, square foot gardening involves dividing a garden plot into equal 1 foot by 1 foot squares and planting different things within each square.  This provides an excellent opportunity to practice another great gardening concept: companion planting.

First things first, though. I needed to divide my garden beds into 1-foot squares, so using bamboo stakes and some twine, I did just that:


The soil looks so dry in this photo, but it's only the surface because it's been in the sun all day.  The garden itself has been well watered and is still quite moist beneath.

Now that I have the grid laid out to guide my planting, I can sit back with a glass of wine and plot out where to plant what.


Sitting on my deck in the shade of my gazebo, I first draw diagrams of the two garden beds I am going to plant using the square-foot model. Next, I list all the various seeds and plants that will populate these two beds and, using the convenient companion planting chart in Mark's book, I mark on the diagrams where to plant or sow each plant or seed. Fortunately, nothing I am planting (tomatoes, carrots, lettuce, peas, peppers, rosemary, Italian parsley, garlic chives) are antagonistic to one another -- they are either beneficial to one another (carrots and tomatoes, for example) or neutral (any of the vegetables versus any of the herbs). So, laying out where to plant what was more a matter of how many seeds/plants I had of each type and how much space each would need as a fully grown plant.


That done, I decided it was late enough in the afternoon to call it a day and so I poured myself another glass of wine, sat on my deck, put my feet up and relaxed into a glorious spring evening.

The next day, I got busy and, using my diagrams as a guide, gathered all the seeds and seedlings together and brought them down to the garden to be planted.


I placed the pots of each of the seedlings and purchased plants in their assigned squares so I could go around planting each of them in turn without having to continually reference the diagram. I placed cages around the determinate Oroma tomato seedlings so they would be identified as such.  In this post from last year, I mention how determinate varieties of tomatoes like Oroma only produce fruit for a certain length of time before the plant dies off whereas indeterminate varieties like my Roma, Opalka and Black Brandywines will keep on producing fruit as long as you keep harvesting up until frost finally kills the plant.


I now have 5 different heirloom tomato varieties, all non-GMO:  Oroma, Roma, Opalka, Black Brandywine, and a cherry version of Black Brandywine that appeared in my garden on its own for the first time last year.  I saved seeds from it, along with my other varieties, processing them for storage over the winter. I am thrilled that all the seeds I started earlier this year have grown into strong, healthy seedlings and I am terribly excited to see if the Black Brandwine cherry tomatoes actually produce cherry tomatoes again in a second generation. Stay tuned.

For now though, in order to identify the various types of indeterminate tomatoes, I borrowed from the masking tape flag manoeuvre I used earlier on clothes pins to identify started seeds. Since indeterminate tomatoes grow on ever lengthening vines, I find these handy metal spiral stakes make great supports for them as you can wind the plants into the supports as they grow. Consulting my planting guide, I've selected enough spiral supports for each of the indeterminate tomatoes I am planting and I have marked each at the top with a masking tape flag identifying the tomato variety.


Once all the seedlings and plants have been planted and any necessary supports installed, I again consulted my planting guide and sowed seeds for heirloom rainbow carrots, non-GMO Scarlet Nantes carrots (large, nicely cylindrical and great for slicing and freezing), red, green and mixed heirloom lettuces, dill and garlic chives.  Using cedar woodworking shims bought in a bundle from Home Depot and a black permanent marker, I made and installed name tags for each of the planted areas.


And again, labours done for the day, I sat on my deck with a glass of wine and admired my efforts! Looking at similar shots to this one above from last week and the week before, I am again struck by the difference a week makes and how the garden has filled in.

According to the weather forecast, we are supposed to be in for a lovely week with higher than normal temperatures and only the occasional shower. I'm hoping it turns out to be true, but frankly I'm just happy to be on vacation this week and now that the vegetables are planted I can turn to cleaning up the rest of the yard and planting the marigolds and thyme to keep the raccoons at bay.  It may be still early yet, but I haven't noticed much evidence of them yet. I like to think that it's all the garlic I've planted around the yard (I even threw some over the back fence and into the bushes and I see it's starting to flourish there in the shade), but that's probably just wishful thinking on my part. The urban raccoons of Toronto are legendary in their craftiness, so it's just a matter of time before they pay me a visit, I'm sure!


Sunday, May 15, 2016

Garden chores: vegetable bed preparation

It appears Mother Nature continues to want to toy with us. It's been a little cooler than normal for the last week or so, but still quite pleasant. Until yesterday, that is, when it started to feel like winter was back upon us!


Next weekend is the long Victoria Day weekend in Canada and is the unofficial first long weekend of the summer season. It is traditionally the weekend where those of us with gardens plant them with seeds and young plants either purchased or started indoors. It's one of the single busiest weekends for garden centres here in Southern Ontario.

In preparation, I needed to get the remainder of the vegetable bed ready for planting, so I got busy digging.  Over the course of the day, however, a chilly breeze rose up and developed into a cold wind. A front was moving in bringing cold rainy weather with it.


While I was digging, I noticed rogue raspberry canes and daylilies were once again growing under my neighbour's fence and getting quite large. I have other plans for this area, so I decided to dig them up before they got any bigger and pot them up to donate to the upcoming annual sale of the garden club my friend Colin belongs to.


The newly dug bed measures 7 feet wide, which is perfect to split into two 3-foot beds. I had dug the first 3-foot bed a couple of weeks ago and planted it with peas which are now just starting to sprout. Together, these three beds form the footprint for three raised beds that I am planning on constructing this fall ready for next year.


So, all I needed to do was place a spare deck board between the 3-foot and 4-foot mark to divide the newly dug area into two 3-foot beds. Once I had sown a few more peas for succession planting, I was done! Cold and tired, I retreated into the house, took a nice hot shower and settled in for the evening.

The weather forecast was calling for near-freezing temperatures overnight last night and another chilly day today, so I took no chances and brought all the seedlings inside. As the forecast turned out to be correct and it is not exactly a beautiful spring day out there today, I'm glad I did! The long-range forecast is calling for warmer temperatures by mid-week and a warm, sunny Victoria Day weekend.  I sure hope so!


My day's labours done, I couldn't help but take this shot of the garden to show that, despite the cooler weather lately, the difference in growth over the course of a week is amazing at this time of year. It never ceases to captivate me!


Wednesday, May 11, 2016

Garden chores: topping up soil, planting new perennials, starting the pond

I realize this is a few days after the fact, but this past weekend was just glorious for working in the garden -- lovely and sunny, but not too warm.  Truth be told the breeze was actually rather chilly if you were just sitting out, but if you were up and about it was quite pleasant.


The cherry tree is starting to bloom and it looks like it will be covered in blossoms shortly! Nothing screams "May" to me more than cherry trees in bloom. If I can keep the birds away, perhaps I'll have another decent crop of cherries this year.  We'll see!

Meanwhile, back in March I ordered a load of perennials from Vesey's. Typical of me, I was entranced by all the gorgeous pictures and ended up ordering way more than I really needed, but they're all so stunning, at least their pictures are, that I couldn't resist!  Anyway, a week ago Tuesday, a banker's box arrived on my doorstep, firmly packed to capacity with sprouts, crowns and roots that really needed to be planted immediately, however I knew I wouldn't have time until the weekend, so following the included planting guide, I left the box in a cool shady spot under my deck in the meantime.  

I must say I am impressed with the quality of Vesey's plants as well as their packing and packaging. Bare roots and crowns were packaged in breathable plastic bags filled with sphagnum and sprouts were packaged with root balls intact in breathable plastic inside clever cardboard tubes with pushed-in locking strips that prevented the root balls from shifting and/or breaking apart.

So, here's what I got:


And they all needed to be planted a.s.a.p.!


But, of course, this wasn't just the simple task of planting roots, crowns and sprouts in the garden. No, I had garden renovation work to do first.  Several of the hostas I bought were earmarked for around the pond, but before I could plant, I needed to rebuild the waterfall and build up the soil in the rock garden behind it. The waterfall leaked terribly, so I had turned it off last year with every intent of repairing and rebuilding it then, but, as usual, other things got in the way so I never did get to it until now. 

Anyway, after much putzing around with the placement of the rocks and positioning the water hose, I got the waterfall working to my satisfaction and added soil to the top of the rock garden ready to receive the hostas.  To the left of the pond along the edge of the patio, the soil level of the garden bed had dropped a few inches over the last few years, so I needed to dig up the current residents (a rather large sedum and some coral bells), top up the soil and replant them along with more of my new purchases:  the bee balm, more coral bells, the alstroemeria and the butterfly flower, edging the bed with the pinks.  In addition, I moved an astilbe from the other garden bed where it was being crowded out by a spirea bush into this bed where hopefully it will set off the coral bells and the alstroemeria. As for the phlox, I planted them further up along the fence, joining a huge hot pink phlox I had planted years ago.


And since my deck is rather sheltered and the weather went back and forth between sun and cloud, I thought I would bring the tomato and marigold seedlings out of the greenhouse so they could enjoy the open air for a couple of days.


All in all a good day's work and even though it threatened rain off and on all day (it actually did sprinkle for a moment or two!), the garden was bone dry, so I put the sprinkler on for a few hours. The rhubarb is shooting up nicely, but so far nothing from the peas down at the bottom of the garden. The seeds I planted are a couple of years old and perhaps they are no longer viable. I do have some new seeds that I will plant this week and hopefully they will soon be sprouting up.

Now that all the crucial planting has been done, I can turn to digging the remainder of the garden this weekend and get the soil prepared for lettuce, carrots, the tomatoes and cucumbers as well as the marigolds and some more thyme to help deter the raccoons.

Spring is such a marvelous time of year. Everything is fresh, green with new life sprouting forth and it's just so wonderful to see the world waking up after a long, cold winter!


Monday, May 2, 2016

Garden chores: transplanting rhubarb, sowing peas

With another beautiful Saturday upon us, I got an early start to the day because there was I lot I wanted to accomplish. While the coffee was brewing I got busy and set up my portable greenhouse.


I bought it at Lowes and I've been using it now for a few years as a sort of cold-frame in which to harden off seedlings in after they come up from under the lights of the nursery. I initially set it up in the dining room to hold court until later in the month, but after checking the long-range weather forecast (like THAT'S ever right!), decided to take a chance and put it out on the deck where it will get full sun.

Tomatoes, zinnias and marigolds out in the morning sun!
I only had managed to up-pot my Black Brandywine cherry tomatoes at this point, so I brought them up and put them out in the greenhouse.  I am keeping the zinnias and marigolds in their cellpacks until I plant them in the garden, so I brought them up and put them in the greenhouse as well.  I cut open a white plastic bag into a flat sheet and ran it over the top of the greenhouse frame, but under the clear plastic cover to act as a diffuser to protect the seedlings from the harsh mid-day sun.


Meanwhile, back in the nursery there's space now for me to start some more marigolds, some pickling cucumbers and a bit of dill to go with them. I made a killer batch of garlic dills a couple of years ago and I'm hoping to do it again this year!  It rained on Sunday so I spent it up-potting the remaining tomatoes and putting them out in the greenhouse and then got busy and planted the marigold, cucumber and dill seeds as well as some mystery seeds my friend Colin gave me.  He thinks they may be Russell Lupins, but we will see.  It will be interesting if they are because I have never had much luck with them.

Anyway, I had the greenhouse out on the deck and the tomatoes, zinnias and marigolds were now in it and the coffee was ready, so I poured myself a mug and took it outside to survey the site.


This is where the rhubarb has lived for the past 3 or 4 years and it's never done very well.  I get lots of stalks, but they are all small and skinny.  This spot doesn't get much sun.  It was about 8:30am when I took this picture and you can see the shadow from the shed already starting to creep over the bed. I had been wanting to move them for a few years now and today was the day!


This is where the rhubarb will live from now on.  I used my trusty garden claw to turn over a bed alongside the cherry tree.  This photo was taken at the same time as the one above and within an hour or so it will be in full sun.  Since rhubarb is a rather heavy feeder and likes compost and composted manure, I will dig some of each into the bed prior to moving the plants.


My compost pile hasn't seen much action over the past couple of years, so it was ready for a good digging. A couple of wheelbarrow loads of compost and three bags of manure and the bed was good to go!


Snug in their new home!  And you can see the sun is just about over my neighbour's fence and it's not even 9:30am at this point.  With all this sun and lots of nutrients, I'm hoping to get some glorious big rhubarb stalks this year.

Next up were the peas.


I've been reading an excellent book by Canadian garden guru Mark Cullen called "The New Canadian Garden" and a couple of points have inspired me.  One is raised beds.  Although it would be a bit too much for me to build raised beds for this year, I will look into building them this fall in time for next year.  So, in preparation I decided to measure out plots where the raised beds will go in the hopes of maximizing the available garden real estate. Three feet wide seems to be optimal which allows you to reach all plants without having to bend or stretch too far.  I've decided to make mine 18" high instead of the usual 12" to allow me to accumulate more good soil and lessen the amount I have to bend to tend to my plants.

So, using a tape measure and a long stick as a guide, I mapped out and dug a 3-foot wide bed for my peas.


I used the garden claw to loosen and turn over the soil as well as remove weeds (which it does wonderfully!) and dig in some more manure and compost.


A couple of years ago, I devised this system of drilled wooden posts strung with twine to act as supports for the peas as they grow.  This picture shows everything in place with peas already in the ground.  I will continue to sow a few more peas every 2 weeks until the end of June so I will have a supply of peas throughout the summer.

This coming weekend, weather permitting, I will dig the other beds and plant some lettuce and carrots using the other point I picked up from Mark's book: square foot gardening.